
Yoga Pose Insights: Eagle Pose (Garudasana)
Some poses in yoga will challenge our balance and some poses in yoga will challenge our flexibility. Eagle Pose (Garudasana) is one of those that will challenge both. That being said, it is also a pose that can be done by beginners and with modifications, those who have, shall we say, need to improve in flexibility.
Some may be wondering why a pose that is named for a bird renowned for its ability to soar seems to be trying to bind us literally hand and foot. To an observer this pose looks intricate and intriguing due to the double wrap of the arms and the legs, but there is a very simple step by step process that will allow even beginners access to this pose.
Contraindications of Eagle Pose
There are some reasons we may need to avoid this pose and one of them is knee problems. The binding position of the legs can stress and already irritated knee. If you have knee cartilage problems or your knees feel uncomfortable, do not create the final binding position. Do nothing in this pose to irritate your knee. Forcing things will not make your knee better. Injured rotator cuff muscles will not like the arm posture as it stresses both the internal and external rotator muscles. As with any pose, do nothing that causes your discomfort or strong sensations.
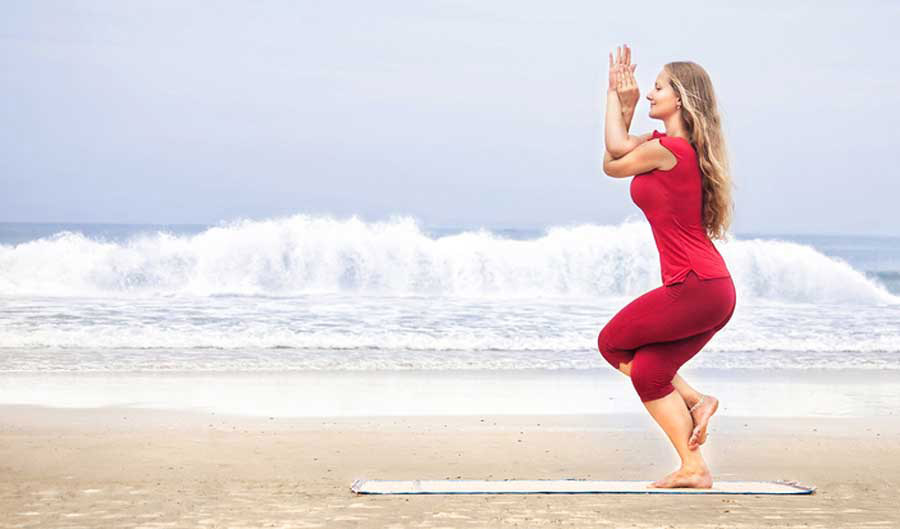
Traditional Eagle Pose Instruction
- Stand with your feet together and bend both knees slightly.
- Shift your weight to your right foot. Lift your left foot and bring your left leg in front of your right leg.
- Pause with your left toes touching the floor beside your right foot. This can be a good spot for beginners working on their balance. If your balance is steady here then proceed to the next step.
- Keep your left toes pointed and slide your left foot backward until you can hook the top of your left foot behind your right lower calf. Bending your knees a little more will help you make the ‘foot hook’ happen.
- Maintain your balance on the right foot.
- Stretch your arms forward with your palms facing each other.
- Cross your left arm over your right arm and with your left elbow over the top of your right elbow, bend your arms so that your fingers are pointing upward.
- The backs of your hands are now facing each other and if you move both wrists toward the middle you may be able to slide the edges of the hands past each other and bring your hands palm to palm.
Most who are beginning this pose find that with all that extra maneuvering to bring a foot across an ankle and the hands palm to palm that balancing is very difficult. Doing this pose with your back to a wall so that when you bend your knees your pelvis touches the wall (feet away from the wall) can increase your balance and allow you to adjust your body into the pose.
If the balance seems to rob you of any access to the pose, the following variations may interest you:
Kneeling Eagle Pose Variation
- This version starts out kneeling on the floor in a table top position where hands are under the shoulders and knees under the hips.
- Bring your knees together on your mat.
- Slide your left leg forward, bringing your knee toward your chest until you can bring your left foot forward of your right knee.
- Slide your left foot along the outside of your right calf, bringing your left foot along side your right calf.
- Lift up your left foot and cross the foot behind your right lower calf.
- Gently lower your elbows to the floor and bring both elbows to the center.
- Cross your left elbow over your right and then lift your right wrist up and cross it over your left wrist, bringing your palms together.
This variation removes the balance issue and can let you concentrate on crossing the arms and the legs, but it is not for everyone since it involves kneeling. Those who feel discomfort from kneeling or those who have wrist issues may find it uncomfortable. The next variation involves just the leg portion of this pose and reduces some of the wrist pressure.
Eagle/Dog Variation
- Start in a downward dog position with your hands shoulder distance wide and your feet together. Keep your head between your arms and look toward the tops of your feet.
- Bend both of your knees, letting your heels lift from the floor.
- Transfer the weight to your right leg and cross your left leg in front of your right leg.
- Bring your left foot around the outside of your right calf and cross the foot behind your right lower calf.
This variation allows you the opportunity to be stable and also see what your legs are doing. The downward dog position is easier on the wrists than the table top position so it can be held longer with greater comfort. Yet for those who must avoid inverted positions this may not be an option. The following variation will be suitable for almost everyone:
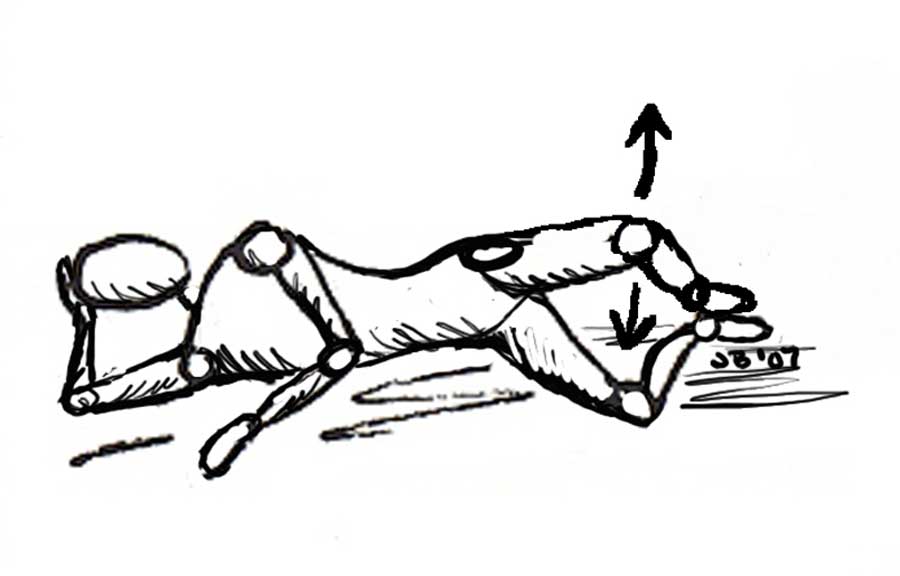
Reclined Eagle Variation
- Recline on your back with your feet on the floor and your knees bent.
- Cross your left knee over your right knee. (If you prefer you can bring your feet off the floor)
- Bring your left foot to the outside of your right calf and cross the foot behind your lower right calf.
- Reach your arms upward with your palms facing each other.
- Cross your left arm over your right arm and with your left elbow in front of your right elbow, bend your arms so that your fingers are pointing toward your head.
- The backs of your hands are now facing each other and if you move both wrists toward the middle you may be able to slide the edges of the hands past each other and bring your hands palm to palm.
This last version should be suitable to most, but some may still find they are not able to do more than slightly cross the leg or slightly cross the arm. At no point should you force your body into the pose. There is a lot of difference between body types and this pose is easier for some and harder for others due to differences in leg lengths, muscle mass, arm lengths and general flexibility.
If you have been gifted with shorter arms and legs, large thighs and calves or a large chest, this pose will be particularly challenging. This does not mean you will not gain benefit from the pose, but rather your benefit is achieved before you complete the final binding position. Many find that their initial attempts with this pose are frustrating but it gives them a good way to check on their developing flexibility. Some will find that with patient practice they can eventually gain the necessary skill and flexibility to create the final bind position. Take your time. This is not a race. It is also not a contest.
Benefits of Eagle Pose
There are several benefits to Eagle Pose in all the variations:
- Hip stretch, especially the outer hip and external hip rotators.
- Shoulder stretch, especially the shoulder blade muscles (rhomboids) and rotator cuff muscles.
- Enhanced focus and concentration (especially in the standing version).
- Improved balance (from the standing version)
- The ability to soar like an eagle – okay, not that, but wouldn’t that be great!
With the above variations you may find that Eagle Pose will soon become a pose you can master. Remember to have fun with it and be kind to yourself. No pose is worth an injury so don’t force the positions. Work gently and focus on creating a comfortable stretch. In time you will find yourself soaring with the eagles.

Hi Julie,
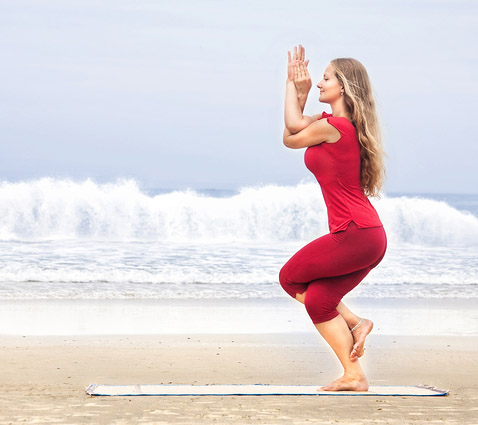
Absolutely LOVE the creative variations of Eagle Pose! I just had a quick question regarding the wrapping arms. I’ve always learned the pose with the OPPOSITE arm on top, i.e. if the left leg is on top, the right arm is on top. And this is how it’s demonstrated in the photo on this page. However, in your traditional instructions and all of the variations, you instruct the SAME arm as leg to be on top. I have read that either way was acceptable and the way you’ve described it is actually more difficult. I was mostly just curious if you taught both versions and if you had a preference?
Thanks heaps!
Hi Stephanie,
I do practice it both ways and find it to be a slight difference. In the standing version, placing the opposite arm on top may add a slight advantage to those who are less flexible because in that situation it would bring the opposite shoulder forward which would balance the stance in the hips. This balance enhancement diminishes once the shoulders and hips are more flexible as they would remain more parallel to each other.
I suggest practicing it both ways and if you find one method to be a little more challenging then work toward mastering that action.